How To Grow Kale: A Comprehensive Guide
As a passionate gardening enthusiast, I’m thrilled to share my knowledge and experience on how to grow kale successfully. Kale, a member of the cabbage family, is not only a nutritional powerhouse but also a versatile and delicious addition to your garden and kitchen.
In this comprehensive guide, I’ll provide you with valuable insights, tips, and step-by-step instructions to ensure your kale plants thrive and reward you with a bountiful harvest.
Kale – Just A Trendy Superfood?
Kale, with its vibrant green or purple leaves, is not just another trendy superfood; it’s a vegetable packed with essential vitamins, minerals, and antioxidants. Adding kale to your diet can help boost your immune system, support digestion, and promote overall health and well-being.
By growing your own kale, you have the advantage of consuming it at its freshest and most nutritious state, straight from your garden.
Benefits of Growing Kale
Before we delve into the practical aspects of kale cultivation, let’s explore some of the incredible benefits of growing this leafy green:
1. Nutritional Powerhouse
Kale is often referred to as a nutritional powerhouse for a reason. It’s loaded with vitamins A, C, and K, as well as minerals like calcium, potassium, and iron. These nutrients contribute to healthy bones, a strong immune system, and improved cardiovascular health.

By incorporating kale into your diet, you’ll be fueling your body with an abundance of essential nutrients.
2. Versatility in the Kitchen
One of the remarkable qualities of kale is its versatility in the kitchen. Whether you’re adding it to salads, blending it into smoothies, sautéing it as a side dish, or even using it as a pizza topping, kale adds a delightful burst of flavor and texture to any meal.
With its slightly bitter taste and robust leaves, kale brings depth and complexity to your culinary creations.
3. Continuous Harvest
Another advantage of growing kale is its ability to provide a continuous harvest. As you pick the mature outer leaves, the inner leaves continue to grow, ensuring a steady supply of tender greens.
This means you can enjoy fresh, homegrown kale throughout the growing season, from early spring to late fall, depending on your climate. The more you harvest, the more the plant produces, making kale a sustainable addition to your garden.
Choosing the Right Variety
When it comes to kale, there is a wide range of varieties to choose from. Each variety offers distinct flavors, textures, and appearances, allowing you to find the perfect fit for your taste and gardening conditions. Here are some popular kale varieties to consider:
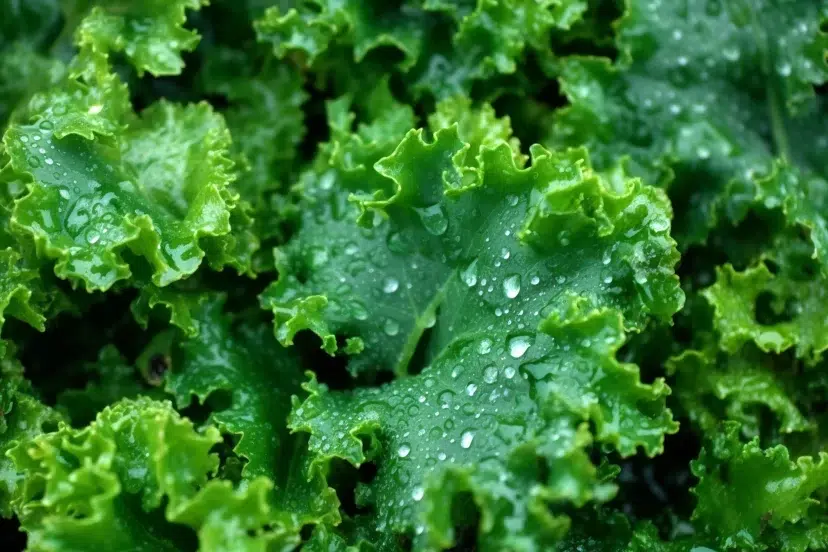
1. Curly Kale (Brassica oleracea var. acephala)
Curly kale is perhaps the most recognizable kale variety, thanks to its tightly ruffled leaves. It has a robust, slightly bitter taste, making it a favorite for adding texture to salads and stir-fries. This variety is exceptionally hardy and can withstand colder temperatures, making it ideal for fall and winter gardening.

2. Tuscan Kale (Brassica oleracea var. acephala)
Also known as Lacinato or dinosaur kale, Tuscan kale is a visually striking variety with long, narrow, dark green leaves. It has a sweeter, milder flavor compared to curly kale, making it a popular choice for sautés and soups. Tuscan kale is exceptionally heat-tolerant and can thrive in warmer climates.

3. Red Russian Kale (Brassica napus)
Red Russian kale features stunning purple stems and fringed, blue-green leaves. This variety adds a vibrant pop of color to your garden and culinary creations. It has a delicate, sweet flavor with a hint of pepperiness. Red Russian kale is adaptable to various growing conditions and can be harvested at different stages of maturity for versatile use.

When selecting a kale variety, consider factors such as flavor preferences, climate, and the growing season. Experimenting with different varieties allows you to explore new flavors and textures while adding visual interest to your garden.
Preparing the Soil
To give your kale plants a strong foundation for healthy growth, preparing the soil is crucial. Proper soil preparation ensures that your plants receive essential nutrients, adequate drainage, and a suitable pH level. Follow these steps to prepare your soil for growing kale:
1. Selecting the Location
Kale thrives in full sun, but it can also tolerate partial shade. Choose a spot in your garden that receives at least 6 hours of direct sunlight daily. If you live in a region with scorching summers, providing some afternoon shade can help prevent the leaves from wilting or turning bitter.

Additionally, ensure the area has well-draining soil to prevent waterlogging, which can lead to root rot.
2. Soil Testing
Conducting a soil test is highly recommended before planting kale or any other crops. A soil test reveals valuable information about your soil’s pH level and nutrient composition.
Testing kits are readily available at garden centers, or you can send a sample to a local agricultural extension office for analysis. Based on the results, you can adjust the soil pH and nutrient levels accordingly.
3. Soil Enrichment
Kale thrives in fertile, loamy soil with a slightly acidic to neutral pH range of 6.0 to 7.5. Begin by removing any weeds or debris from the planting area. Loosen the soil using a garden fork or tiller, breaking up clumps and improving aeration.
Incorporate organic matter, such as compost, well-rotted manure, or leaf mold, into the soil. This enriches the soil with essential nutrients, improves its structure, and enhances moisture retention capabilities.
4. pH Adjustment
If your soil test reveals an unsuitable pH level for kale, you can adjust it by adding amendments. To increase acidity, incorporate organic matter like peat moss, pine needles, or elemental sulfur into the soil.
If the pH is too acidic, add garden lime or wood ash to raise the pH. Follow the recommended application rates specified by the product manufacturers, and work the amendments into the soil thoroughly.
5. Soil Moisture
Before planting kale seeds or seedlings, ensure the soil is evenly moist but not waterlogged. Kale requires consistent moisture throughout its growing season to thrive. If your soil tends to retain too much moisture, consider improving drainage by adding organic matter or raised beds.
By taking the time to prepare your soil properly, you’re creating the optimal environment for your kale plants to flourish.
Sowing Kale Seeds
Sowing kale seeds is an exciting and rewarding step in the journey of growing kale. Whether you choose to start seeds indoors or sow them directly in the garden, following these guidelines will help ensure successful germination and robust plant growth.
1. Seed Selection
Selecting high-quality kale seeds is crucial for a successful growing experience. Look for reputable seed suppliers or consider saving seeds from your own healthy kale plants. Opt for fresh seeds that are within their expiration date for better germination rates. Additionally, consider choosing disease-resistant varieties to minimize the risk of plant infections.
2. Starting Indoors
Starting kale seeds indoors allows you to get a head start on the growing season, particularly in regions with shorter growing seasons or harsh winters. Here’s how to start kale seeds indoors:
2.1 Fill seed trays or small pots with a sterile seed-starting mix. Alternatively, you can use peat pellets or homemade seedling pots made from newspaper.
2.2 Moisten the seed-starting mix to ensure it’s evenly moist but not waterlogged.
2.3 Sow the kale seeds about ¼ to ½ inch deep in the seed-starting mix, spacing them approximately 2 inches apart. Gently press the soil over the seeds to ensure good seed-to-soil contact.
2.4 Place the trays or pots in a warm location, ideally around 70°F to 75°F (21°C to 24°C). Providing bottom heat with a seedling heat mat can expedite germination.

2.5 Ensure the soil remains consistently moist by misting it with water or using a spray bottle. Avoid overwatering, as it can lead to damping-off disease.
2.6 Once the seedlings develop their second set of true leaves, thin them by removing weaker seedlings, leaving the healthiest ones with a spacing of about 4 to 6 inches between plants.
2.7 Continue to provide ample light by placing the seedlings under fluorescent lights or near a sunny windowsill. Adjust the lights or trays to maintain a distance of 2 to 4 inches above the seedlings to prevent them from becoming leggy.
2.8 When the risk of frost has passed and the seedlings have developed a strong root system and several sets of true leaves, they are ready for transplanting outdoors.
3. Direct Sowing
Directly sowing kale seeds in the garden is another viable option, especially in regions with longer growing seasons or milder climates. Here’s how to sow kale seeds directly in the garden:
3.1 Prepare the soil in the planting area following the soil preparation guidelines mentioned earlier.
3.2 Create shallow furrows in the soil using a garden trowel, spaced about 12 to 18 inches apart. The depth of the furrows should be approximately ½ inch.
3.3 Sow the kale seeds along the furrows, spacing them about 2 inches apart. Cover the seeds with soil and gently press it down to ensure good seed-to-soil contact.
3.4 Water the seeded area gently but thoroughly, ensuring the soil is evenly moist.
3.5 As the seedlings emerge and develop their second set of true leaves, thin them to provide enough space for healthy growth. Aim for a final spacing of about 8 to 12 inches between plants.
4. Succession Planting
To enjoy a continuous harvest of kale throughout the growing season, consider practicing succession planting. This involves sowing additional kale seeds every few weeks, ensuring a staggered and consistent supply of fresh leaves.
Succession planting also helps mitigate the risk of all your kale plants maturing simultaneously, allowing you to manage the harvest more effectively.
By choosing the appropriate method for sowing kale seeds, you’re setting the stage for healthy growth and a productive kale garden.
Caring for Kale Plants
Kale plants, like any other vegetables, require regular care to ensure optimal growth and productivity. By providing the following care considerations, you’ll nurture your kale plants into robust specimens that yield an abundant harvest.
1. Watering
Proper watering is essential for the healthy growth of kale plants. Here’s how to water your kale effectively:
- Establishment Period: During the establishment period, immediately after transplanting or when seedlings are young, water them regularly to keep the soil consistently moist. Water at the base of the plants, avoiding wetting the leaves to prevent the development of fungal diseases.
- Mature Plants: Once your kale plants are established, they require about 1 inch of water per week, either from rainfall or supplemental irrigation. Water deeply, providing enough moisture to penetrate the root zone. To promote deep root growth, it’s best to water infrequently but deeply rather than light, frequent watering.
- Mulching: Applying a layer of organic mulch, such as straw or wood chips, around the base of the plants helps retain soil moisture, suppress weeds, and regulate soil temperature. Mulch also acts as a protective barrier, preventing soil splashing onto the leaves, which can lead to disease.

2. Fertilizing
To ensure your kale plants receive the necessary nutrients for healthy growth and ample leaf production, fertilization is important. Here are some guidelines for fertilizing kale:
- Before Planting: Prior to planting, incorporate organic matter, such as compost or well-rotted manure, into the soil. This enriches the soil with essential nutrients and improves its overall fertility.
- Balanced Fertilizer: When the seedlings are about 3 to 4 weeks old or after transplanting, you can begin fertilizing with a balanced organic fertilizer or a slow-release granular fertilizer formulated for vegetables. Apply the fertilizer according to the manufacturer’s instructions, ensuring even distribution around the plants.
- Side Dressing: As the kale plants grow, side dressing with additional organic matter or compost can provide a nutrient boost throughout the growing season. Apply the compost or organic matter alongside the plants, avoiding direct contact with the stems.
- Foliar Feeding: If you notice signs of nutrient deficiency, such as pale or yellowing leaves, you can supplement your kale plants with foliar sprays. Dilute a liquid organic fertilizer according to the manufacturer’s instructions and spray it onto the leaves, ensuring complete coverage. This method provides a quick nutrient boost and helps address any nutrient deficiencies.
Always follow the recommended application rates and guidelines provided by the fertilizer manufacturer. Over-fertilizing can lead to excessive foliage growth at the expense of flavor and nutritional quality.
3. Mulching
Mulching serves multiple purposes when it comes to growing kale. It helps regulate soil temperature, retain moisture, suppress weeds, and improve overall soil health. Here’s how to effectively mulch your kale plants:
- Apply a layer of organic mulch, such as straw, wood chips, or shredded leaves, around the base of the kale plants. Aim for a thickness of around 2 to 3 inches.
- Ensure the mulch is spread evenly and doesn’t touch the stems of the plants directly. This prevents moisture-related issues and discourages pests from using the mulch as a hiding spot.
- Regularly inspect the mulch layer to ensure it’s not compacted or waterlogged. If necessary, gently loosen the mulch to promote airflow and water penetration.
Mulching offers numerous benefits, including moisture retention, weed suppression, and the gradual breakdown of organic matter, which enriches the soil over time.
4. Pruning and Thinning
Regular pruning and thinning are essential for maintaining the health and productivity of your kale plants. Follow these guidelines to ensure proper pruning and thinning:
- Pruning: As your kale plants grow, regularly inspect them for damaged, yellowed, or diseased leaves. Prune these leaves carefully, using clean and sharp garden shears. Removing such leaves promotes airflow and prevents the spread of diseases. Additionally, pruning encourages new growth and ensures that the plant’s energy is focused on producing high-quality leaves.
- Thinning: If you have sown kale seeds directly in the garden or if your seedlings are overcrowded, thinning is necessary to provide enough space for healthy growth. When the seedlings have reached a height of around 4 to 6 inches, thin them out, leaving the strongest and healthiest plants with adequate spacing (approximately 8 to 12 inches). Thinning ensures that each kale plant has sufficient access to light, nutrients, and water.
Regular pruning and thinning promote the overall health of your kale plants, enhance air circulation, and reduce the risk of pest and disease issues.
5. Pest and Disease Control
While kale is relatively resistant to pests and diseases, occasional issues may arise. Here are some common pests and diseases that can affect kale and methods to control them:
5.1 Aphids
These small, soft-bodied insects feed on the sap of kale plants, causing leaf distortion and yellowing. Use a strong jet of water to dislodge aphids from the plants or apply insecticidal soap as a natural control method. Ladybugs and lacewings are beneficial insects that prey on aphids.
5.2 Cabbage Worms
Cabbage worms are the larval stage of white cabbage butterflies. They feed on the leaves, leaving behind holes and causing significant damage. Handpicking the worms or using organic insecticides, such as Bacillus thuringiensis (Bt), can effectively control cabbage worm infestations.

5.3 Flea Beetles
These small, jumping insects feed on the leaves, resulting in small holes and a stippled appearance. Floating row covers can prevent flea beetles from reaching the plants. Applying a layer of organic mulch also helps deter them. If necessary, use organic insecticides labeled for flea beetle control.
5.4 Powdery Mildew
Powdery mildew appears as a white, powdery coating on the leaves. It thrives in humid conditions and can hinder plant growth. To prevent powdery mildew, ensure proper spacing between plants for good airflow and avoid overhead watering. If powdery mildew is present, treat it with organic fungicides or homemade remedies such as a mixture of water and baking soda or neem oil.
5.5 Clubroot
Clubroot is a soil-borne disease that affects brassica crops, including kale. It causes stunted growth, wilting, and malformed roots. To prevent clubroot, practice crop rotation and avoid planting kale in areas where clubroot has previously been present. If clubroot is suspected, remove and destroy infected plants, and consider using resistant varieties in the future.
5.6 Slugs and Snails
These pests can cause significant damage to kale leaves, especially in wet conditions. Create physical barriers like copper tape or use organic slug and snail baits to control their populations.
Regularly inspect your kale plants for signs of pests or diseases and take appropriate action at the first sign of trouble. Early intervention can prevent widespread infestations and keep your kale plants healthy.
Harvesting and Storage
The moment of satisfaction arrives when your kale plants reach maturity, and it’s time to harvest the luscious leaves. Here’s how to harvest and store kale properly:
1. Harvesting Kale
- Leaf Harvesting: For leafy greens, such as kale, leaf harvesting is the preferred method. Begin harvesting when the leaves reach a desirable size, typically around 8 to 10 inches in length. Start by picking the outermost leaves, working your way inward. Snip the leaves just above the central stem using clean garden shears or sharp scissors. Be careful not to damage the stem or new growth points, as these will continue producing leaves for future harvests.
- Cut-and-Come-Again Method: To encourage continuous leaf production, utilize the cut-and-come-again method. Instead of removing the entire plant, selectively harvest the mature outer leaves, leaving the inner leaves to grow. This method allows the plant to continue producing new leaves, extending the harvest period.
2. Storing Kale
To prolong the freshness and quality of harvested kale, proper storage is crucial. Here are some storage tips to ensure your kale remains fresh and flavorful:
- Rinse and Dry: After harvesting, gently rinse the kale leaves under cool running water to remove any dirt or debris. Shake off excess water or pat the leaves dry with a clean kitchen towel.
- Prep and Package: Trim off any tough stems or damaged parts of the leaves. Place the kale leaves in a perforated plastic bag or airtight container. Perforating the bag or using a container with small holes allows for proper airflow, preventing moisture buildup and prolonging shelf life.
- Refrigeration: Store the bag or container in the refrigerator’s crisper drawer or a cold storage area with a temperature range of 32°F to 40°F (0°C to 4°C). The cool temperature helps retain freshness and prevents wilting. Use the kale within a week for the best flavor and nutritional value.
- Freezing: Alternatively, if you have an abundance of kale, you can blanch and freeze it for longer-term storage. Blanching involves briefly immersing the kale leaves in boiling water, followed by immediate cooling in an ice bath to stop the cooking process. Once blanched, drain the kale thoroughly, pack it in airtight freezer bags or containers, and store in the freezer.
Remember, kale is best enjoyed when it’s fresh, so try to harvest and use it as soon as possible for maximum flavor and nutritional benefits.
Final Thoughts
Congratulations! You are now equipped with a comprehensive guide on how to grow kale successfully. By following the steps outlined in this article, from selecting the right variety to caring for your plants and harvesting a bountiful crop, you’ll be well on your way to enjoying the nutritious goodness of homegrown kale.
So, roll up your sleeves, get your hands in the soil, and embark on an exciting journey of growing this versatile and delicious leafy green. Your taste buds and body will thank you!
FAQs – How To Grow Kale: A Comprehensive Guide
Q1. Can kale be grown in containers?
Absolutely! Kale can be successfully grown in containers, as long as the containers are large enough to accommodate its root system. Choose deep containers with drainage holes and use a well-draining potting mix.
Q2. Is it possible to grow kale indoors?
Yes, kale can be grown indoors. Ensure your indoor space receives adequate sunlight or use grow lights to provide the necessary light intensity. Keep the temperature and humidity levels appropriate for kale growth.
Q3. Can I grow kale in hot climates?
While kale prefers cooler temperatures, some varieties are more heat-tolerant than others. Choose heat-resistant varieties and provide afternoon shade to protect the plants from scorching heat.
Q4. Can I save kale seeds for future planting?
Yes, kale seeds can be saved for future planting. Allow the kale plant to bolt and produce flowers. After the flowers have dried and formed seed pods, collect the pods, and remove the seeds. Store the seeds in a cool, dry place in airtight containers.
Q5. Can I grow kale year-round?
Kale is a cool-season vegetable that thrives in spring and fall. However, in mild winter climates, it can be grown year-round with proper protection from frost.
Q6. How can I prevent my kale from becoming bitter?
Bitterness in kale can be reduced by growing it in cooler temperatures or providing shade during hot periods. Harvesting younger leaves also tends to be less bitter compared to mature leaves. You can also blanch the leaves before using them in recipes to mellow out any bitterness.
Q7. What companion plants work well with kale?
Kale benefits from companion planting with herbs such as dill, chamomile, and thyme, which attract beneficial insects and deter pests. Other compatible companions include beets, onions, and garlic.
Q8. How can I naturally deter pests from my kale plants?
Natural pest deterrents for kale include planting companion flowers, using physical barriers like row covers or netting, introducing beneficial insects like ladybugs and lacewings, and using organic insecticidal soaps or neem oil sprays.
Q9. Can I eat kale flowers?
Yes, kale flowers are edible. The flowers have a milder flavor compared to the leaves and can be used in salads or as garnishes. Harvest the flowers when they are still in bud form for the best taste.
Q10. Can I grow kale from cuttings?
While kale is typically grown from seeds, it is possible to propagate kale from cuttings. Take 4- to 6-inch stem cuttings from mature kale plants, remove the lower leaves, and place them in a glass of water until roots develop. Then, transplant the rooted cuttings into containers or the garden.

*We may earn a commission for purchases made using our links. Please see our disclaimer to learn more.


