Back To Eden Gardening – Grow Your Own Food
Back to Eden Gardening is a revolutionary approach to organic gardening that prioritizes soil regeneration, healthy plant growth, and nutrient-dense food production. By utilizing wood chips as a mulch, this gardening technique eliminates the need for tilling or digging.
This results in numerous benefits such as increased gardening success, abundant harvests, reduced labor, lower water requirements, decreased weed growth, and cost savings.
In this comprehensive guide, we will delve deeper into the principles and practices of Back to Eden Gardening, providing you with the knowledge and tools to implement this technique successfully.
The Back to Eden Gardening Movie DVD
To fully grasp the concepts and techniques of Back to Eden Gardening, it is highly recommended to watch the Back to Eden Gardening movie. This DVD offers invaluable insights, bonus features, and gardening tips that will enhance your understanding and application of this gardening method. If you don’t already own the DVD, consider ordering it to access a wealth of valuable information.
When to Install a Back to Eden Garden
Ideally, the installation of a Back to Eden garden is recommended during the fall season, aligning with the natural process of leaves and branches falling to cover the soil in nature.
By following this timeline, you can simply lay down weed-smothering paper and a 4-inch layer of fresh arborist wood chips on your soil, allowing nature to decompose and improve the soil over the winter without requiring extra labor.
However, if you haven’t installed a Back to Eden Garden and wish to begin in the spring or summer, do not worry! It is not too late to get started. Nonetheless, there are additional steps you should take to ensure optimal results and avoid potential growing problems.
Smothering Weeds and Grasses with Weed Paper Mulch
One crucial aspect of Back to Eden Gardening involves effectively smothering weeds and grasses before applying wood chip mulch. While it may be tempting to save time and effort by tilling in the weeds and grasses, doing so can introduce weed seeds into the soil, leading to increased labor in weed removal later in the season.
Additionally, tilling can disrupt soil structure and harm essential soil life necessary for healthy plant growth.
If your garden site is already an established vegetable garden plot without weeds or grasses, you can skip this step. However, if your garden site is overrun with weeds or grasses, it is imperative to lay down a smothering paper mulch layer directly on the soil before applying wood chips.
Neglecting this step and placing wood chips directly on top of the weeds and grasses will result in a garden overtaken by resilient weeds and aggressive grasses.
While wood chips alone can smother most weeds if applied in a thick layer (12+ inches), such a thickness is unsuitable for planting a productive vegetable garden bed. Therefore, it is crucial to start with a smothering paper layer to create an optimal environment for your plants.
Installing the Weed Smothering Paper Mulch Layer
To prepare your garden site, begin by removing tenacious weeds like thistles by their roots. However, it is acceptable to leave the remaining weeds and grasses in place, as they will contribute nutrients to the soil and attract beneficial earthworms.
If the weeds and grasses are too tall to accommodate the paper mulch layer, mow or weed whack them to a manageable height. Various options exist for effective weed smothering paper mulch layers, ranging from free and easily accessible to more expensive alternatives. Consider the following options:
Paper Mulch Layer Options
1. Newspaper Sheets
Apply four layers of black and white newspaper sheets, ensuring they are non-glossy and free from colored ink. Wet the newspaper down after applying to hold it in place. Newspaper sheets can often be obtained for free from neighbors or local recycling centers.

2. Newspaper End Rolls
Apply three to four layers of blank newspaper end rolls, which can sometimes be obtained for free from local newspaper printing companies.
3. Kraft/Butcher Paper Rolls
Apply one to two layers of thicker paper rolls specifically designed to smother weeds and grasses with less effort.
4. Weedguard Plus
Apply a single layer of these certified organic paper mulch rolls, specially developed for organic farming to eliminate weeds. While they may require a financial investment, the time and labor savings they offer can make them worthwhile.
5. Cardboard
Apply a single layer of overlapping cardboard, taking care to ensure there are no air pockets below that could allow weeds to survive. Cardboard is easily accessible and often obtained for free, although it may take longer to decompose in dry climates compared to wet climates.
These options have been tested and proven effective for weed smothering. Personal preferences may vary, but Weedguard Plus rolls are recommended for their convenience, effectiveness, and organic composition.
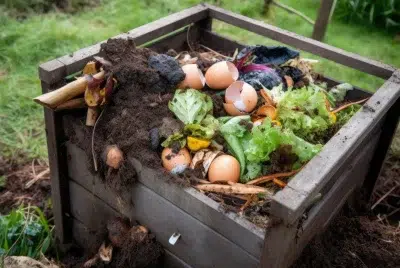
Adding a Layer of Compost in a Back To Eden Garden
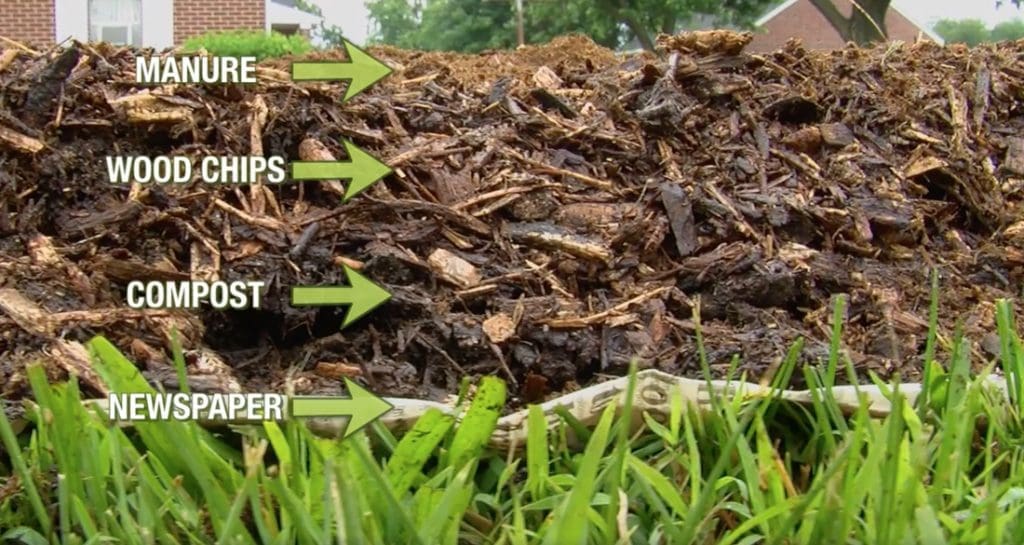
After establishing the weed smothering paper mulch layer, the next step is to apply a 4-6 inch layer of compost on top. Compost, defined as a mixture consisting mainly of decayed organic matter used for fertilizing and conditioning land, plays a vital role in nourishing the soil and promoting healthy plant growth.
Traditionally, compost maintains a carbon-to-nitrogen ratio of 30:1, and when applied to the paper layer, it provides nutrient-rich soil for planting. Compost also contributes nitrogen to the soil, aiding in the decomposition of the fresh wood chip layer without depleting nitrogen levels necessary for plant health.
Sources of Compost
Compost can be acquired either for free or through bulk purchases from municipal yard waste centers or privately operated compost yards. It is crucial to ensure that the compost source is trusted and clean, so inquire about its contents before acquiring it.
For small-scale gardening, such as urban backyard gardens, compost can also be purchased in bags. Look for compost labeled as OMRI Certified Organic to guarantee its quality and suitability for organic gardening practices.
Addressing Wood Chip Nitrogen Issues
In the Back to Eden film, during the installation of the Demonstration Garden in Pennsylvania, a layer of fresh wood chips around 8 inches deep was applied in the spring without additional measures. Consequently, tomato plants displayed yellow leaves, indicating nitrogen deficiency.
To rectify this issue, organic fertilizer was added. Another scenario depicted in the film involved the installation of a second version of the Back to Eden Garden in the spring, which incorporated a layer of compost and even a dusting of horse manure for added caution. This approach yielded better results for immediate spring planting.
Applying a Layer of Wood Chips in a Back To Eden Garden
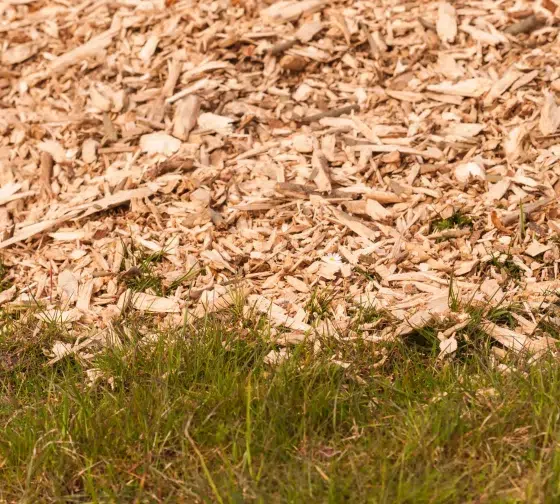
The next step involves applying a 4-inch layer of either fresh or aged arborist wood chips. Fresh wood chips possess the benefit of providing nitrogen to the soil due to their green leaves, which promotes plant growth. On the other hand, aged wood chips are more broken down and finely ground. Both types of wood chips have their advantages and can be utilized based on availability and preference.
It is worth noting that Paul Gautschi, a prominent figure in Back to Eden Gardening, directly sows seeds using both fresh wood chips and composted wood chips. He plants vegetable seeds in the soil beneath the fresh, coarse wood chip mulch layer in his orchards and at his primary home vegetable garden plot.
Additionally, he purchases screened, composted wood chips to sow seeds directly into his vegetable garden. In his screened compost vegetable plot, Gautschi supplements with composted vegetable waste and chicken manure. Both methods have proven highly successful.
However, if fresh wood chips with green leaves are not readily available, it is beneficial to add nitrogen in the form of composted manure or liquid fertilizer.
Pros and Cons of Fresh Versus Composted Wood Chips
Based on personal experiences, fresh arborist wood chips offer more advantages than composted wood chips in the long run. Fresh wood chips excel in retaining soil moisture, suppressing weeds, fostering beneficial microbial and fungal growth, and building healthy soil that mirrors natural conditions.
The only notable drawback of fresh wood chips compared to composted and screened wood chips is the need to be cautious when germinating seeds. It is necessary to clear the wood chips aside to ensure successful sprouting. This can be challenging initially or if the mulch layer is too thick. Additionally, in very wet climates, increased decomposer pest activity, such as slugs and pill bugs, may occur.
Obtaining Wood Chips for a Back To Eden Garden
For gardeners based in the United States, Chip Drop is highly recommended as a platform to request free wood chip deliveries from local tree trimming services. By making a donation offer and specifying the desired quality of wood chips, it is possible to receive regular deliveries. Persistence may be required if immediate responses are not received.
Other methods of obtaining free arborist wood chips include contacting tree service companies directly or foraging wood chip piles on public property. Alternatively, compost facilities may sell green waste composted mulch, although it is essential to avoid purchasing bulk landscaping mulch deliveries or bagged bark or wood chip mulch intended for non-vegetable garden use.
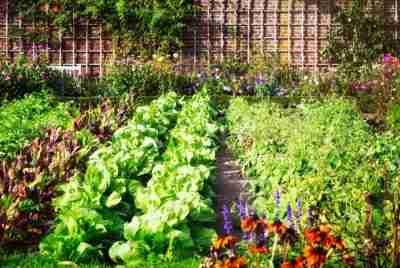
Planting for Back To Eden Gardening
After completing the necessary preparations, it is time to embark on planting in your Back to Eden Garden.
The following guidelines provide insights into the planting process:
1. Planting Seeds in Compost
If you have installed a paper layer in the summer or spring to eradicate tenacious weeds and grasses, it is crucial to consider that the paper layer may not decompose fully by the time you wish to plant.
For instance, WeedGuard paper typically takes 3-6 months to decay. However, this should not deter you from planting in the spring. Instead, a few simple steps can ensure that your plants’ root systems access the soil and grow successfully.
2. Planting Starter Plants
For beginners who have begun their garden planting season late, using starter plants can be an effective option. When transplanting starter plants, temporarily move aside the wood chips and compost to expose the paper layer.
Using a knife, create an X-shaped opening in the paper and proceed to dig a hole for planting the transplant in the soil. Gently restore the compost and wood chips around the base of the plant.
The compost and wood chips will aid in the decomposition of the paper, provide nutrients when watered, and prevent weed and grass infestation without extensive labor.
3. Planting Seeds in a Back To Eden Garden
When planting seeds, temporarily shift the wood chips and compost to uncover the paper layer. Seeds must be planted directly into the soil or compost beneath the wood chip mulch. To facilitate the growth of roots through the paper layer, cut or hole punch the paper where the seeds will be sown.
A dibber can be used to create holes in the paper, ensuring they are large enough (2-4 inch diameter) to allow sunlight access for germination. Alternatively, Weedguard Prepunched Hole Paper can be purchased to save time and effort. Sow the seeds in the holes, cover them with compost, and water thoroughly.
Once the seeds have sprouted and grown several inches tall with multiple leaves, wood chips can be applied as a side-dressing.
Planting Tips: Radish seeds are an excellent choice for testing the readiness of your soil for seed planting. Radish seeds germinate quickly, and the color of the leaves and the health of the root provide valuable insights into soil quality.
Yellow sprouts indicate nitrogen deficiency, necessitating the addition of composted animal manure as a fertilizer. If radishes fail to produce vegetable roots but exhibit healthy top growth, potassium and phosphorus deficiencies are evident.
Wood ash (potassium) or bone meal (phosphorus) can be added to amend the soil. Green sprouts and red radish roots signify healthy soil, indicating readiness for planting in your Back to Eden garden.
4. Selecting the Best Seeds to Plant for Back To Eden Gardening
The choice of seeds plays a vital role in your gardening success. Opt for organic, heirloom, and high-germination-rate tested seeds for optimal results. Below are some recommended varieties based on the growing season:
5. Planting Spring and Summer Seeds
Consider planting perennials to create an edible food forest in your garden. Fruit bushes, vines, berries, herbs, and fruit and nut trees are long-lasting plants that do not require replanting. They provide shade, reduce labor, offer a consistent food supply, and enrich the soil with their leaves and roots.
Integrating perennial food forests can significantly improve the outcome of your annual vegetable garden and minimize the effort required.
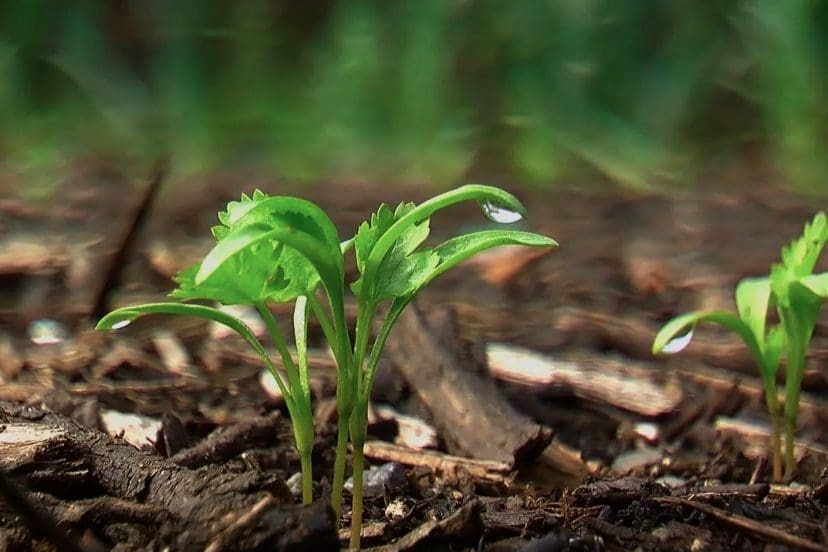
Watering Your Seeds and Starters
Seeds require consistent moisture for successful germination. If your climate does not receive sufficient rainfall to support natural germination, daily watering is necessary until the seeds sprout. Once the sprouts emerge, reduce or stop watering, as overwatering can be detrimental to plant health.

To determine if watering is required, insert your fingers two inches into the soil to check for moisture. Avoid watering if the soil is already moist, as excessive moisture can lead to root rot. As your plants grow, their roots will strengthen, requiring less frequent watering.
Final Thoughts
Congratulations! You have successfully implemented a Back to Eden Garden and can anticipate its continuous improvement and productivity in each growing season.
Remember to add a fresh 4-inch layer of arborist wood chips every fall or whenever the existing layer has sufficiently decomposed to maintain optimal conditions for your garden.
By embracing Back to Eden Gardening, you are fostering a regenerative and sustainable approach to organic gardening that yields healthy plants and nutrient-dense harvests.
FAQs – Back to Eden Gardening
Q1. Can I start a Back to Eden garden in any season?
Back to Eden gardening is typically recommended to be installed in the fall, but you can start one in the spring or summer as well. Just make sure to follow the additional steps outlined in the article to ensure success.
Q2. How often should I add a fresh layer of wood chips in a Back To Eden Garden?
It is recommended to add a new layer of wood chips every year in the fall or whenever the existing layer has decomposed enough to become thin. This helps maintain moisture retention, weed suppression, and soil health.
Q3. Where can I find arborist wood chips for my garden?
One great resource is Chip Drop, a platform where you can request free wood chip deliveries from local tree trimming services. Additionally, contacting tree service companies directly or foraging wood chip piles on public property can be viable options.
Q4. What if I can’t find weedguard paper or other paper mulch options?
If you are unable to find specific weed smothering paper mulch, you can use multiple layers of black and white newspaper sheets or even cardboard. Just make sure to wet them down and apply them thickly to effectively smother weeds and grasses.
Q5. Can I use wood chips from my own property?
Yes, you can use wood chips from your own property as long as they are from healthy trees and free from chemicals or contaminants. Chipping tree branches and limbs from pruning or removal projects can provide a convenient source of wood chips.
Q6. How do I deal with pest issues in my Back to Eden garden?
While Back to Eden gardening generally discourages the use of chemical pesticides, there are natural methods to address pest issues. Encouraging beneficial insects, such as ladybugs and lacewings, can help control pests. Additionally, manual removal of pests, such as handpicking slugs, can be effective.
Q7. Can I grow a variety of vegetables in a Back to Eden garden?
Absolutely! Back to Eden gardening supports the growth of a wide range of vegetables, herbs, fruits, and even perennial plants. With proper planning and selection of suitable varieties for your growing zone, you can enjoy a diverse and productive garden.
Q8. How often should I water my Back to Eden garden?
The watering frequency for your Back to Eden garden will depend on various factors, including climate, rainfall, and the moisture-retaining properties of your wood chip mulch. It is crucial to check the soil moisture by inserting your fingers into the soil. Water when the soil is dry two inches deep, but avoid overwatering to prevent root rot.
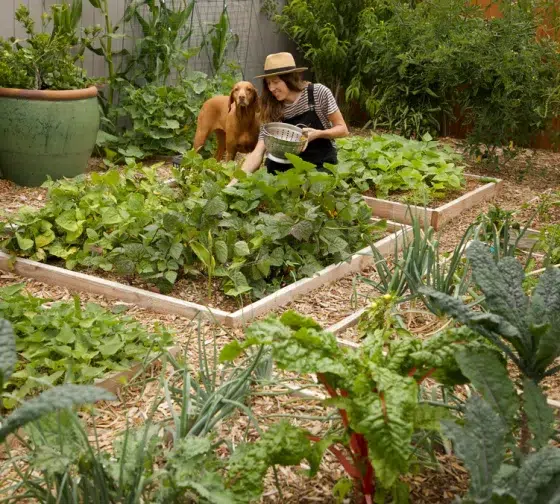
Q9. Can I use Back to Eden gardening in containers or raised beds?
While Back to Eden gardening is primarily designed for traditional garden beds, you can adapt the principles to container gardening or raised beds. Ensure proper drainage and adjust the application of wood chips and compost accordingly.
Q10. How long does it take for the wood chips to decompose and improve the soil using this Back To Eden Gardening technique?
The decomposition rate of wood chips can vary depending on factors such as the type of wood, chip size, climate, and microbial activity. Generally, it takes several years for wood chips to break down completely and enrich the soil. However, during this process, they continue to provide numerous benefits to your garden, such as moisture retention and weed suppression.
*We may earn a commission for purchases made using our links. Please see our disclaimer to learn more.